You can read about how the hull was designed in part 1. Now we’re going to be discussing how the plug was made, which is the starting point for producing the mould.
We’ll go over:
- Creating a frame from a 3D design.
- Filling the frame to bulk up the empty space.
- Coating and shaping the frame with builders filler to make the plug.
- Strengthening the plug with a layer of fiberglass.
- Creating a smooth surface with Q-cell.
- Adding topcoat for the final surface and polishing it.
Creating the surface
To start building the plug we need a surface to build it on, and considering the surface needs to be 3 meters long this is something that had to be built. So a quick trip to the DIY shop with a few beams and sheets of chipboard and we had our surface. Although we were going to build the plug on the surface I didn’t want it to actually stick to it, so I covered it with sheets of baking paper. This was actually really useful at later stages when the plug had to be moved around, as it allowed the plug to slide.

Creating the frame
To start the plug we built a frame which consisted of precise cross sections (the ribs) joined up along a centre piece, the spine. But how do you go from a 3D model to the actual frame? Well, every 40cm or so on the 3D model we took a cross section view and printed it out to scale. Then by gluing the printouts on to our chipboard we had an accurate template to cut the wood. These wooden pieces were then attached to the centre piece.

Once the structure was created and in position we screwed it in place from the underneath to ensure it did not move. This was essential because to make our mould we were going to fibreglass over the plug and on to our surface, which creates the flange of the boat, so we couldn’t have it moving around.
Shaping the plug
Now that we have a rough shape of the boat, we actually needed to fill it. So using lots of expanding PE (polyurethane) foam I created walls in each section. I then stuck all my household recycling inside and encased it with more foam. A word of warning though, the PE foam is very toxic and very sticky, so wear gloves and a mask and make sure you don’t have good shoes on!


Once all the hollows had been filled, using a combination of sanding and sawing the excess foam was trimmed. As the surface of the foam is quite coarse we coated it with builders filler (Polyfilla). This provides us with a smooth surface and the ability to sand and refine the shape a little. However, this step of refining the shape took ages. For a starter, I made the decision to change the shape of the boat on the fly. I was concerned that the curve supporting the upper deck was too sharp and that it wouldn’t be strong enough, so I extended the curve.
Make sure your design works first!

Removed excess foam and sanded 
Added polyfilla
What ensued was days of filling, sanding and measuring to ensure that we had the right shape. As I no longer had the cross sections as a guide to follow it was very difficult to make sure the shape was symmetrical. I definitely felt like I’d become a sculptor and now I have a lot more appreciation for this painstaking art.
Sculpting a symmetrical shape
In order to help make the plug symmetrical a flexible ruler was used to measure the curves. This helped because first, we could take measurements, but mainly because it’s flexible you can take an imprint of the shape of one side of the boat, and then line it up against the other to see where the high and low spots are.


Use a flexible ruler to measure symmetry
My recommendations would be to make sure you have the shape exactly as you want it at the design stage, and add more cross sections. This way, our shape would have been fairly accurate from the start.
Strengthening the plug with fiberglass
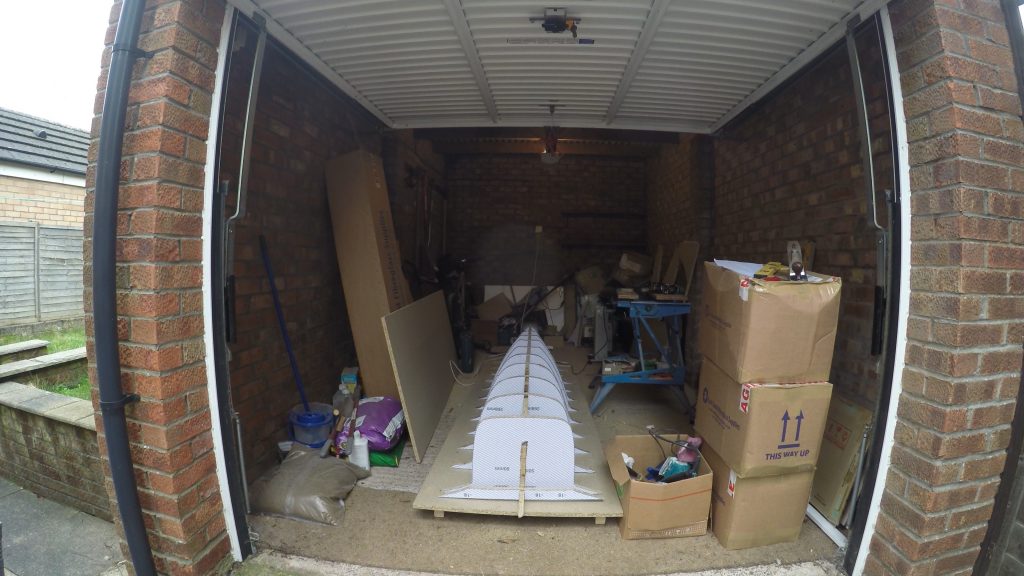
As the plug is just built from recycling topped with foam and builders filler, we needed to put a layer of fibreglass on it to give it some strength. Now so far, the boat has been built on my kitchen table, and I was going to do the fiberglassing here. However I’ve never fiberglassed before and I’d read posts about the smell (emphasis on bad smell) of the polyester resin. I can categorically say that you should NEVER do this in the house. The smell coming from the sealed containers was so bad we decided to do it in the garage.

Always fiberglass in a well ventilated area
The only issue that stopped us doing this before was that it was winter and the garage was really cold (0-10 degrees). So we spent some time putting up a sheet to try and trap the heat and used lots of heaters to bring the area up to temperature.
Check temperatures with an infrared thermometer
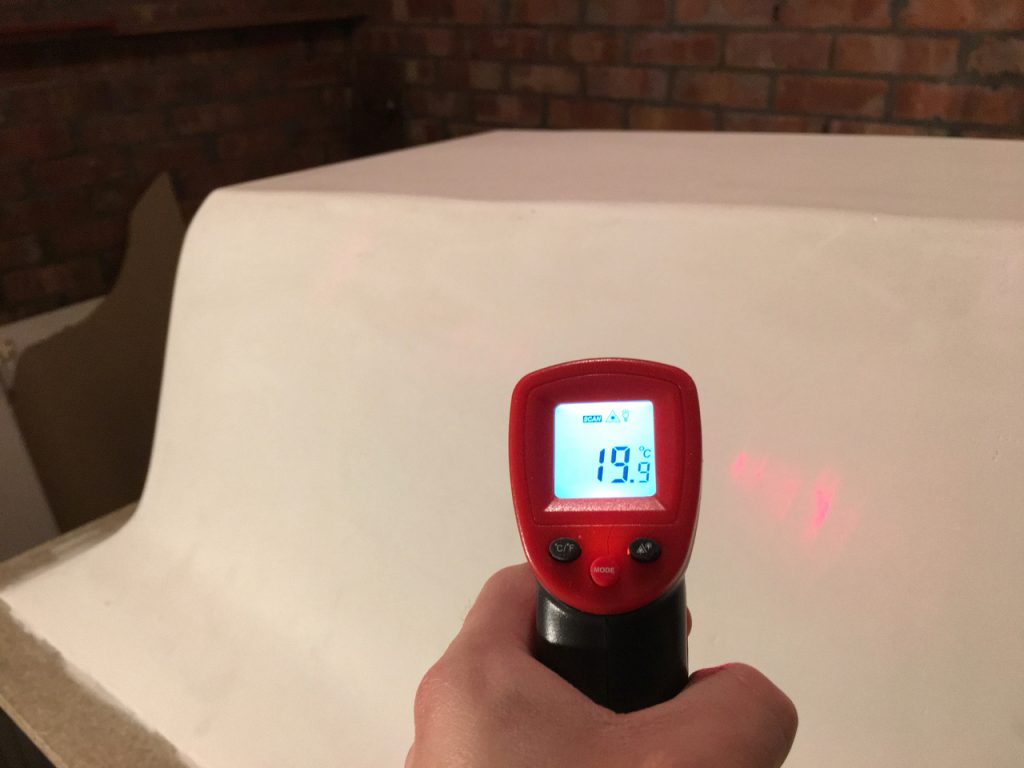
The ideal minimum temperature for fiberglassing, or one that as a beginner I’d feel comfortable at is > 10-15 degrees. To check the temperature of the surface I used a infrared thermometer, and then put a layer of 300gsm chopped strand matt fiberglass on it (read more about fiberglassing in part 3.) As the fiberglass is not smooth we still needed to produce a smooth and strong surface.
Apply Q-cell
I used Q-cell which are very light white particles that you mix with resin to make a paste. The idea behind this is that it solidifies on top of the fiberglass and gives us a good surface which can be sanded. It’s like flour, but the particles float, you really have to mix it well to get it in to the resin. As the paste is thicker than resin I tried a combination of dripping it on and painting it on. What ultimately happened was that I mixed a massive batch and the container broke. So whilst the catalysed paste is flowing out of the container I ran over to the plug and threw it on the top. What resulted was a very uneven surface, and considering that on top of the builders filler we’ve since put fibreglass and Q-cell, it needed to be heavily sanded and measured to ensure that we still had the correct shape. My biggest advice here is that Q-cell is a nightmare to sand, so only use minimal amounts and try to apply as smoothly as possible.

A horrific experience of adding on Q-cell 
After hours of sanding
Always build so you have the least amount of sanding
We’re getting so close to the end of the plug, but the funs not over yet. One of the last stages is to put a layer of topcoat on the plug and sand it which produces a polished surface ready for fiberglassing the mould. Topcoat and gelcoat are very similar except topcoat will cure when exposed to the air whereas gelcoat needs a non-oxidised environment.
Now I should add that before this project I’d never fiberglassed or done any of this before, but I had scoured the internet for weeks reading about all the topics. There seems to be a big division between spraying on and painting on topcoat. As spray painting looked like it would give an even coat I purchased an air compressor and sprayer, but again this is where more problems started.
Applying and polishing topcoat
So I poured the topcoat in to the sprayer using a cheap HVLP gravity gun with 2.5mm nozzle but it wouldn’t spray, so I used acetone to thin the topcoat. Now you should be able to thin by around the 20% (ballpark from memory), however I ended up adding a lot more, around 50% which really shouldn’t be done, but the paint just wasn’t spraying properly. If you add too much then this can change the colour and properties of the topcoat.
Then I realised that I hadn’t bought the sprayable topcoat, so after buying the sprayable stuff, it still wouldn’t spray. It became a messy process because on some attempts I had added catalyst, which meant the gun needed to be fully cleaned with acetone otherwise the topcoat would cure and jam it up.

Attempting to spray on topcoat 
Ripples formed by the topcoat 
Initial sanding complete 
Sanding through different grades to create a polished surface.
After many attempts of sitting on the garage floor with lots of messy topcoat and acetone I decided to opt for plan B and paint it on. From videos I’ve seen online the spraying results have been good, but I just couldn’t get it working. That being said I’ve seen lots of people who’ve painted it on and had excellent results too, so I think both methods are valid.
Have fun polishing!
After applying 2 coats of topcoat I sanded it through multiple grits in order to polish it. I started with dry sanding using grits 60, 80, 120, then wet using grits 400, 500 and 1000. To wet sand I just added a bit of soap and water to the sanding process. This was the most satisfying part as the sanding created a beautifully polished plug. I breathed a sigh of relief at this stage because so much effort had been involved in making it, and it was now taking the shape of a boat. However in truth, this was still the beginning!

Read part 3 (coming soon) to learn about how the fiberglassing was done to create the mould and boat.


0 Comments